This is fun, trust me, but you might want to brew yourself a big pot of tea, as this will take a little while. It’s a lot of reading, I know, but I didn’t find a good way to split this into several blog posts, so bear with me.
So – You’ve written a book, you’ve edited it, you’ve gone through the somewhat tedious steps of converting it into an eBook. Now the big moment has arrived, and you are ready to publish!
Why Amazon?
The logical place for you to publish your eBook is through Amazon’s Kindle Direct Publishing (KDP). The reason is simple: According to Forbes, about 20% of all book sales in the U.S. are Kindle titles. Or, if you look at it another way: eBooks have a 30% share of all U.S. book sales, and Amazon has a 65% share in that category. In fact, these numbers are from last year and could very well have increased by now. So maybe you don’t like Amazon? You think they have too much market power, and all that? Well. If you’re a just-starting-out self-published author, or hope to be one soon, you’re going to like that market power. It’s common sense to tap into the biggest market segment first.
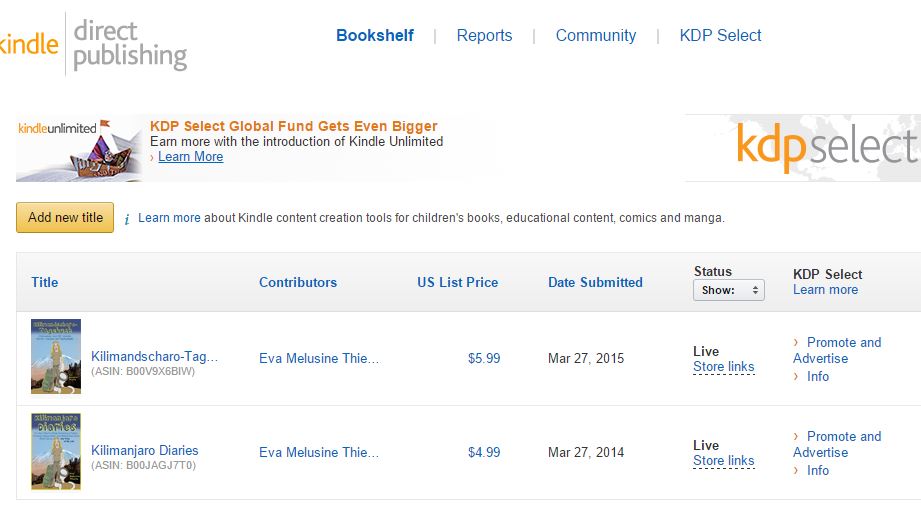
If you haven’t done so yet, create a KDP account at http://kdp.amazon.com and enter all the relevant account info, including address and tax information. Click on the orange “Add new title” button and enter all the information. Right off the bat, you’ll be asked a difficult question: whether you want to enroll your new book in KDP Select or not. So we’ll have to take a minute to talk about that.
KDP Select
KDP Select is a program you can join for 3 months at a time. It lets you offer your Kindle book for FREE for a total of 5 days (separately or all at once, however you wish) within that period, and participate in Kindle Countdown Deals, a promotional discounting tool. It also adds your book to the Kindle Owners Lending Library (KOLL) where you get some money every time your book is borrowed, and Kindle Unlimited, a service that readers can subscribe to for monthly downloads (think of it as a type of Netflix for books). All of this helps your book gain visibility, which is very important for any new book. The more people see it, the more might read it, and the more might leave reviews for it, which is a crucial element in – you guessed it – making it visible to more people.
The downside, you’ll ask? You have to make your book EXCLUSIVE to Amazon for those 3 months. Once again, if you do the math with the above market share percentages, I don’t see this as a huge problem. The lion share of your eBook sales is going to come from your Kindle book, so you might as well sell it there exclusively, at least for a limited time. The first 3 months your book is being sold will be a busy time for you, marketing it, offering it up for reviews, maintaining your social media profile, etc. You will barely notice how quickly they pass. So I’ll recommend you click the checkbox for KDP Select and enroll your book in it (but of course you don’t have to!). I didn’t, at first, with my book, choosing to make it available on most other platforms as well by publishing via Smashwords, and I sold ONE copy there in several months. It really wasn’t worth the effort (more on Smashwords in another blog post), and so making it exclusive to Amazon via KDP Select was a no-brainer. You don’t have to renew after 3 months, it’s completely optional.
Upload to KDP
Next, enter your book title and subtitle. If it’s a novel, you may not have a subtitle (or if you’re like me, you’ll have a subtitle the length of one of my son’s college essays). You probably won’t have an edition number at this point, nor will you have a publisher if you’re self-publishing, so leave those fields blank.
“Description” is the next field, and this is where you should concentrate all your energies. This is where you get to market your book, where you can summarize it so that a potential reader is intrigued enough to at least take a peek inside. It’s what you’ll find on the back of a paperback, or the inside flap of a hardcover. It shouldn’t just be a summary. It needs to be witty as well as a bit dramatic, and it needs to be fairly brief. If you haven’t written this “blurb” for your book yet, I suggest you take a break and go to your bookshelf. Or open a new tab on your browser and go to Amazon.com. Take a look at some of your favorite books, and/or books in your particular genre, and read their blurbs. Figure out which ones appeal to you the most and why you like them, and then sit down and craft one for your book in a similar fashion.
A Good Blurb
Don’t despair. This might take some time, and you might tweak it a few more times, even once your book is uploaded. The good news with KDP is, you can continually change your book as often as you want, so it doesn’t have to be perfect. Still, I’d want to make sure I have a good blurb up before releasing my book into the world. Investing some time now will benefit you later. You might want to make a fact sheet for your book to hand out at local bookstores, and you’ll want a blurb on there. You’ll want to list it on other sites such as Goodreads, and you’ll want a good blurb for that. You might even want to query some publishers, even after you’ve self-published, and a good blurb can form the basis for another thing that’s hard to write, a synopsis. I won’t get into the details of all of that, but generally a synopsis is a lot longer than a blurb, like several pages, a blow-by-blow (or chapter-by-chapter) summary of your book, including the end.
The blurb, on the other hand, should not give anything away. Still, it needs to convey the setting, the main characters, and, most important, your writing style. If you use humor in your book, this is where it should come through. To give you an idea, here is a short excerpt from the blurb for The Year of Living Biblically by AJ Jacobs, one of my favorite authors:
He immerses himself in prayer, tends sheep in the Israeli desert, battles idolatry, and tells the absolute truth in all situations—much to his wife’s chagrin…
The part about the wife made me laugh, and I wasn’t disappointed when reading the actual book. It was indeed as funny as I imagined. By the way, don’t be fooled: Even though many blurbs read like the publisher wrote them ABOUT a book, in most cases the author him- or herself is responsible for writing the blurb, so you are in no way an anomaly. You’ll just have to overcome your distaste at writing about yourself in the third person.
Next, add yourself as “contributor” with the title “author” and don’t worry about any others. You just need to have one, and I’m not sure what benefit there would be in adding any others, except of course if Barack Obama happens to have written your foreword. You might want to tell the world about that, otherwise one author is all you need, and it should be you. Select your language, don’t worry about an ISBN, and assert your publishing rights by clicking the “This is NOT a public domain work” button. Then select the appropriate categories (you are allowed two).
Categories are Important
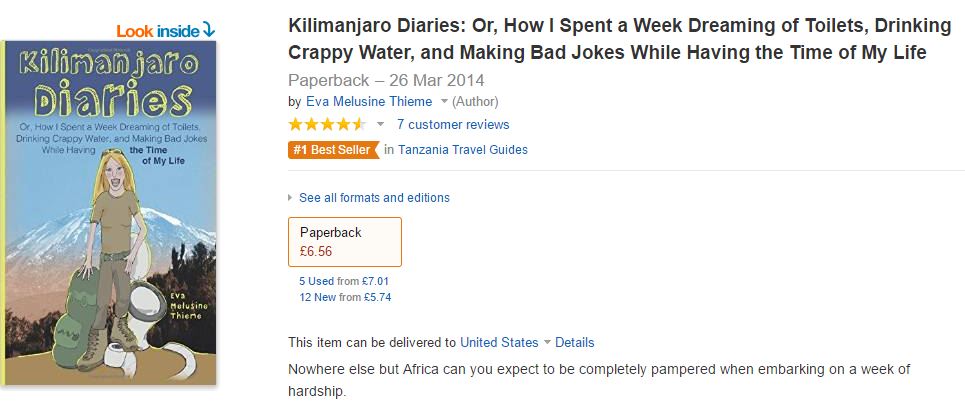
Everyone knows that it’s better to be a big fish in a small pond. And so it is with Amazon. There are millions of Kindle books out there, and no one is going to find yours without a little help. That’s where the categories come in. Amazon offers readers all sorts of tools to wade through the depths of its site. For an example, go ahead and visit Amazon.co.uk. Shop by department, then books. Scroll down a bit and on the left you will see a listing of categories, from Arts & Photography to Travel. See how there are 375,000+ travel books alone, for instance? But once you click on that, you’ll see there are only 14,000 or so under “Countries & Regions –> Africa”. Now find Tanzania, click on that, and you’re down to 235 books. That’s the pond I’m fishing in. I know, small fish in the grand scheme of things, but consistently showing up in the #1 and #2 spot on that page (and earning the coveted #1 bestseller badge) has helped my book gain visibility in the UK, making that the bestselling market for my paperback.
You can change the categories at a later date, but the earlier you get them right, the better your book’s visibility, so it pays to give this some thought. Go ahead and browse books similar to your own and see how they’re categorized and what rank they have. Yes, you want to be visible to a broader audience, but at the beginning, it’s a matter of showing up on the FIRST PAGE of the Amazon listing of that category, i.e. the Top 20. Smaller categories help with that.
Same with the keywords – you get seven, so choose carefully. I’m not sure that they’re as important as the categories, but they certainly don’t hurt.
Select you book release option – now vs. pre-order. Pre-order didn’t use to be open for self-published titles, so it’s nice to have that option. I haven’t tried it yet, but it sounds like a good idea to be able to pre-market your book a bit and give it some hype, especially if it’s your second or third one and you have a list of people you can inform. However, I think once you set the date you can’t change it. So be careful that you are sure that you pick the right one, so as not to sit there with a half-finished book about to publish and not enough time to finalize it.
Your Book IS Judged by its Cover
Don’t fool yourself. You can have the most brilliant book since To Kill a Mockingbird, and still people won’t buy it if it’s got crappy cover art. They will TOTALLY judge your work of art by its cover, especially since they don’t know who you are. The blurb’s important too, but the cover is key. Yes, you can do it yourself in Photoshop, but it will show, so do yourself a favor and have it professionally designed. It’s worth paying a few hundred dollars for.
But of course you CAN do it yourself, if you insist. A regular JPG file is fine. Click on the “cover guidelines” and you will see that, at a minimum, it should be 625 pixels on the shortest side and 1,000 on the longest, or 2,500 for optimum quality. You will also notice that there is a button called “Launch Cover Creator.” Presumably you can generate covers with that, but I’ve heard some not-so-flattering reports about it. Then again, if you insist on doing the cover yourself (don’t!), you might as well use the program Amazon gives you for it.
The good news is, for an eBook you don’t have to worry about the back cover or the spine, or even precise dimensions. However, you do have to worry about the fact that people will mostly see a fairly small thumbnail of your book cover when browsing Amazon, so don’t make the typeface on it too small, or put too much detail on it. My subtitle for Kilimanjaro Diaries is rather long, and so hard to see on the Kindle version. I might do it differently next time for that reason. But I also didn’t want to have two different covers between the eBook and the paperback, so I stuck with it.
…and now, drumroll…
I hope you’ve stuck with me this far, because this is your big moment. Under “upload your book file,” click on “browse” and find your file. What you upload is your plain old Word file, no need for a PDF or HTML conversion at all. It actually works best from Word. You just choose the file you’ve written your book in and converted into eBook format (if you’re not sure that you have, read my previous blog post on eBook conversion). Click “Do not enable digital rights management” (don’t ask, just do it, but if you want to know why, I recommend you read Self-Printed by Catherine Ryan Howard, whose words of wisdom I’ve been recommending to anyone willing to listen since I’ve started this series), and wait a few minutes for your book to upload.
Once it’s uploaded, you should get several preview options. You can either preview online, or you can download a preview file, which is nothing else than the actual MOBI file for Kindle. I would do both. I’d preview online, toggling between different Kindle readers to make sure it looks okay on all of them, making sure all the chapter headings look okay, there are no nasty blank pages, etc., and your first paragraphs are nice and flush and – ideally – not indented like the rest of them. And then I’d check the download on my own Kindle. You will LOVE seeing your book on your Kindle, trust me. It is not at all the same thing as seeing it in Word on your computer. It’s a real BOOK!
One thing Kindle doesn’t do yet is hyphenation, at least I haven’t been able to figure it out, so if you have really long words in there (this was a problem with my German translation as Germans insist on the occasional crazy long word) you might get some rather ugly looking lines. Just get over it, there is nothing you can do, and most people reading on Kindles are used to such ugliness.
If KDP finds any typos in your work, it will let you know here as well, and give you a chance to fix it. There is no limit how often you can upload your file, so just keep doing it and test again and again, until you’re satisfied. Once your book is published, you still get to upload new files as much as you want, however Amazon takes your book off the market for a brief period while it’s reviewing your changes (up to a day, but I’ve found they’re usually faster). So, once your book is published, you may not want to correct every single typo you find one at a time, but wait till you’ve found a few of them and do one collective upload. Or, better yet, be pretty sure your book is almost perfect the first time around (it will never be 100% perfect, trust me, you will have to find the sweet spot between good and perfect).
Click “Save and continue.”
On the next page, pick “worldwide rights.” I don’t see any good reasons why you would want to restrict yourself.
How Much to Charge?
This is a topic you can worry yourself sick over. But don’t, it’s not worth it. Amazon makes this easier for us in one way, in that it gives us a range in which we earn 70% royalties (which, by the way, you get nowhere else in publishing). That’s between $2.99 and $9.99. Outside of that, you only get 30%. Another no-brainer – we will price our book between those numbers. But where exactly? Again, go online and check the competition. Look at other Kindle books, preferably in your genre, books that you’d like to compete with, and see where they are priced. If anything, stay at the lower end of the range, but don’t give it away too cheap. I don’t know about you, but a very cheap book, to me, doesn’t look serious. Then again, you shouldn’t try to sell a short story of, say, less than 20,000 words for $9.99, so the length of your book also plays a role. Kilimanjaro Diaries is about 73,000 words long, which makes for about 250 pages in a paperback (remember, Kindle books don’t have page numbers), and I first sold it for $3.99. I’ve since increased it to $4.99.
I don’t think price is hugely important. What will sell your book is a good cover and blurb, a lot of word of mouth, some good reviews once they trickle in, plus some luck. Not selling it cheap. I can tell you this: You can price your book exactly like a Starbucks grande nonfat latte, but people will agonize a whole lot longer over whether to download your book than they will agonize over indulging their coffee addiction every single day. That’s just the way it is, sadly. We might as well face up to it.
Once you’ve decided, go ahead and enter the U.S. price. You will now see, to the right, what your estimated royalty will be. Also notice how the price for the other countries is already set, and a little checkbox is checked, telling your the price for that country is automatically set based on the U.S. price. If you plan on never returning to this page again and don’t want to worry about currency fluctuations, you should probably keep those country boxes checked and let the price do whatever it needs to do. On the other hand, that makes for some ugly prices. If you’re like me, you’ll want your price in Euro bo be 3.99, and not 3.87. It totally depends on you. I went ahead and looked at all the suggested prices, and then I adjusted them up or down manually to make them look more professional. But you’ll have to stop back every once in a while to make sure your price is still in line with your cost, or otherwise you might suddenly make a lot lower royalty on some of those, if the currency fluctuates the wrong way.
I left “Kindle MatchBook” unchecked, and did check “Kindle Book Lending” (as briefly mentioned under KOLL), but don’t ask me why. You can read up on the details of those programs later, but for now I suggest you get on with it, as this has already taken too long.
Go ahead and check the disclaimer box at the bottom, and then… another drumroll… click “Save and Publish.” This should take you back to the Kindle Bookshelf, where now your book will show as published but still under review. You will get an email as soon as it is live.
And then the fun begins. Then you can obsessively watch your sales reports every day and see those numbers flow in. Because, everyone will want to read your book, right?
###
This post is part of the series “How to Publish a Book”. See the entire series:
- Part One (The Writing)
- Part Two (The Editing)
- Part Three (eBook Conversion)
- Part Four (eBook Publication on Kindle) – this installment
- Part Five (Paperback Publication on CreateSpace) – coming up
- also coming up: More on Smashwords, KDP Select, book launch checklist
By the way, if this was waaaaaay too much reading and your head is spinning, and fiddling around with such stuff is totally not your thing, contact me for a quote. I’m now a pro at Kindle eBook conversion and publishing!
